Thursday 22 October 2009

Ooohhh Pretty Blue Lights :)

I've always liked lights, and I like the more recent LED lights, they are low power, bright, decorative, but also work well as working lights. So looking in Ebay, I wanted to find some blue LED's to begin with. Found a seller in Hong Kong, selling 20 12v prewired blue LED's, DELIVERED TO MY DOOR for £3.77 !!!! Would it be enough though ? They couldnt be that bright for that kind of money, and must be really poorly made, right ?.

:) Nope. Arrived about a week later, 20 as promised, all with a good length of wire already soldered on. So 20 would probably not be quite enough around the doorstep and roof would it, I did want them to light up the entrance to the back of the van on the side door, as the main lights now had their switch on the opposite side next to the cupboard, when the side door was opened at night, nothing now comes on. Hooked one LED up to a power source to try and gauge how many more I needed to buy. Hmmm. Blue dots for the next 10 minutes ensures me that I have enough already ! :) In fact I end up fitting 3 LED's into the side door step, and just 2 in the roof just inside the door pointing downwards. The roof ones you dont really notice when they arent on as the carpet fibres pretty much hide them. So have 15 left to play with :) Oh and play with I will ;). By the way, from the same company, now have 50 white, 20 green, and 20 ultraviolet ones coming ! :) The white ones I am thinking of embedding in the side wall behind the sink and hob in the shape of the VW logo, as the kitchen doesnt have a light at present, might put them in a seperate board first that can be fixed to the wall, in the same yellow carpet, just to see what it looks like before I start drilling holes in the side panel and ruining it. Incidentally the LED's are powered from the existing interior light wiring, so that they come on when the door is opened, and they power from the vehicle battery not the leisure battery, which isnt a problem as you can leave these on all day long without affecting the battery for starting. They are cold running too, they dont get hot, so no risk of overheating and starting a fire.


Had another thought today, I havent yet shown any pics of the bed made up, so think you guys may be wondering if it even has a bed ! :) Well it does, and this is it below, works great, quite pleased with the design, good old fashioned mechanics, nothing fancy, but works a treat, Im a big guy and it copes with my weight no problem at all. Think you will agree it looks kinda cosy ! lol. The quilt is borrowed, so need to get something that matched the colours more, but you get the idea from these pics, its very comfy, more comfy than our bed at home, and with all the curtains drawn and with the limo tinted windows is really very private. Seeing it like this brings home that my camper is almost done ! :) Well the inside, the outside still has a story to play out, and Im looking forward to seeing how it ends up myself because at the moment I really dont know. Not sure about the mystery machine now, but who knows, it could still happen..... watch this space ;). PS anyone notice the tv up on the cupboard ? :P Its only there temporarily until I think of a better way to mount it, may sink it into the side of the cupboard.

Thursday 15 October 2009

Got my new wheels !


Well not quite, got these £8.99 wheel trims from Lidl's, but I think they look pretty nice for cheapies, and you wouldnt have known from this pic that they werent alloys would you ? Come on be honest :P
Bought some speakers to replace the ones in the dash today too, got a pair of 160 watt JVC 4" speakers from Motorworld, Brockworth, only £18.99, and once fitted, I realised how knackered the old ones were ! Can actually listen to songs with Bass now ! Looking forward to using it tomorrow and testing them out properly ! :)

Monday 12 October 2009

Electrics Well On The Way

As the cupboard is now practically done, I thought Id get on with the electrics. First job was to fit the Zig unit into a board that would fit into the lower cupboard, which was uneventful, its a pretty tight fit, which is good, ive made it a pull down board, so can pull it down and get to the wiring and consumer unit which will be behind.
Next thing was feeding wire here there and everywhere, ran one from back to front for the charging cable, was going to do this out through the floor and to the engina bay, but that looked like hard work, so ended up taking roof panels back down and feeding it up the back, along the roof, down the passenger door front pillar, and out through the bulkhead where it was to join up with the battery.
Had to run 3 cables from each of the 12v sockets (fitted the twin one now), one cable back up over the roof, and down the oppisite side, ready to connect the tap and water pump up.
Then had to rewire the lights to a light switch and the zig unit.

Pleased to say it all works ! lol. Battery state was 12.60v when first testing it, then startet the engine and tested again, was charging at 13.2v, which is great, hopefully wont have to keep charging the leisure battery inside now ! Oh with the battery, you have to have it vented, or it gives off poisonous gases, so in the pics you can see the angle and tubing i got to do this with.

So when I left it tonight, it was still a mess, but got the roof lights working from the zig and on its own power switch, wired the 3 12v sockets, so they now can be used to power whatever.

Still a way to go but its getting there :) Pics below.....


Saturday 26 September 2009

Well as promised, I did my cupboard today :)
Bought 2 pieces of Contiboard, and cut them about a bit, stuck on my doors from yesterday, and voila, a cupboard :)
Battery fits as I hoped it would in the bottom, leaving the middle cupboard for my zig unit and consumer unit, leaving the top cupboard for storage. I have a spare shelf from the left over board, so may split the top one into 2 in future, but thats not a biggy, plastic support either side and its done, for now will leave it a big space.

Its late now and I have to get ready for a photography day tomorrow, so thats all for now, hope the pics are self explanatory, last couple are the smev sink and hob.

Its almost there guys ! :) Soon as ive figured out how to wire the thing up :)


Friday 25 September 2009

Another push.....

....trying to get the inside done before winter sets in.

Well after having used it for the past 2 shows, as a base to sit in and print the photos, I have renewed my interest in getting this finished, at least inside and asap.


Last week I managed to get my Smev 9222 sink/hob ! Well Jen got it for me whilst doing a rescue run, from a guy called Tim in Telford, he had advertised it on The Brick Yard, a forum for T25's, although he owns a T4 now, and had bought a load of stuff to convert it to a camper, only now decided that he wants to leave it as a van, so selling all the bits off again. Anyway, the Smev 9222 was one of the items, and after a few texts, ended up getting it for £175 :) Brand new in the box. All fitted now, only got a phone pic for now, but will take more over the weekend when I do a bit more work. Still have to connect it up.

As you can see it fitted my worktop and frame underneath perfectly, again I made a good decision lol, getting good at measurements, not getting them wrong as much as I used to :)

I have had the burners going, and they are very good, would be great to cook on, although give out loads of heat directly above, I dont really want to put a metal plate above, so will see how hot it gets once I have the roof vent fitted, if its still a problem then might have to.

Tomorrow (saturday) i'm hoping to rebuild the kitchen and raise it slightly, so the doors dont drag the floor, and then build my cupboard for the battery and electrics, already bought the doors today as they were on special, matching to the kitchen doors, reduced from £11, which is for a 400mm wide door and drawer front, down to £8.80, so bought 2 packs, will use both doors and one of the drawer fronts to build a tall cupboard, just have to go get some contiboard tomorrow. The bottom part of the cupboard I am intending to keep the battery in and the zig unit and consumer unit, leaving the top completely free for 2 shelves for storage.

Hopefully once the cupboard is built, I can then plan what electrics are going to go where. I think my tv should still fit on the side of the cupboard, am now thinking I might make some kind of contraption to still swing it round so it can be seen from the back of the camper, for playing wii etc.

Thats it for now, hopefully more text and pics tomorrow and hopefully the cupboard will be mostly there. :)

Saturday 12 September 2009

Wow

.....Has it really been so long since I last posted ?

Well what can I say, we went to Brean, came home, and I have done bugger all since :)

Not sure why, think I may have been all campered out, plus summer holidays is our busiest time what with all these inconsiderate people going on holiday and leaving us with their pets !

Anyway, have recently found some new moitivation, from a couple areas really. 1), Jamie the guy that made my pawprints, he and Becky have bought themselves a T25 camper van, and there is no way im getting left behind :) 2), we took the camper (really must think of a name) up to Vanfest 2009 today !!!!! Oh man it is like camper porn there ! Saw so many nice campers, only one other T4 with a wrap around seat but completely different to mine, it was on show, and very swish. Had a body wrap of flames all round it and was bright red, should have taken some pics, anyway Jamie if you are reading this, the body wrap may be back on, it looked awesome :).

We had our photo taken on the way in to Vanfest car park, so there is a pic floating round somewhere of it that I havent taken ! :) Didnt see one other camper there with the same layout as mine.

I wanted to see if I could get the Smev 9222 sink/hob, but they didnt have ONE stall that sold anything like that. One stall inside the big hut had a sink with a glass lid, that was it.

I have come to a decision that vanfest is totally racist against the T4 as there was hardly any catering for it :P

I did find a door step for the side door, only in black though, but I went with it, it was there, so was i, and jen handed me the money, so i bought it :) It does finish that side step off quite nicely !

When I have fitted it properly, will of course post pics. I need to make a wooden spacer on the step as because the floor is raised with the ply and laminate, it doesnt sit on the floor of the step properly at the moment.

Oh not sure if I have mentioned before, but need a gearbox now too ! Never ending, on the positive side, the more I do, the less there is still to go wrong :P

Well thats it for the time being, I guess its the side step next, then hopefully complete my kitchen, oh nearly forgot :P, when I got home from vanfest, I did a search in google for my Smev 9222 hob/sink, and one came up on Brickyard, there was a guy on there that bought loads of stuff to do a conversion, and now has to sell it as it hasnt worked out, so lots of new bits that havent been used. Have done a deal with him and hoping to get it next week :) Will tell you more when I get it.

Then once thats done, or at the same time as that stuff, I need to build my cupboard and install my electrics, its a pain the leisure battery not charging when the campers running.

Just one more thing quickly, did my first show last weekend, taking pet photos at a dog show, did really well, and used the camper with an inverter to power my laptop and printer so I could print and supply photos there and then. Worked a treat, but was worried it would run the battery down and i wouldnt be able to carry on printing, so have now invested in a small generator, Honda 550watt, very small, quiet, 4 stroke, runs on first pull ! Be very useful for camping too no doubt :).

Tuesday 14 July 2009

We went camping !

Nothing else has been done since the last post, well almost nothing :) We had a weekend away, only down to Brean, and we used our trailer tent to stay in, but the camper was the tow vehicle, and the dog vehicle, and the luggage vehicle, and performed brilliantly :). Didnt know we had the trailer tent on the back, and the sheer amount of stuff I can pack into this camper is amazing !, I didnt think the 2 seat storage areas would be enough, but they hold loads !. We decided to put the bed out, which was the main reason for getting the bed cubes made quickly, so that we could put the giant dog cage on it, with the seat cushions piled up behind on the fixed seat, this left room to store things down the side, and on top of the kitchen unit, and on top the pile of cushions, and we STILL had some room on the floor at the back where the 2 12v cool boxes were, which I ran off of the 12v socket that I fitted last week, using a 2 way adaptor. Leisure battery lasted all the way down there, all the way back, charged the laptop and mobile phones and ipod whilst down there, and I've just come in from work at the chinese, and have been watching tv with it on and off all evening. Good job as I havent fitted any other electrics to charge it yet !
These are a few pics from the weekend.....
This is the camper loaded up just before we left, dogs on board, and you cant see it in the pic but trailer tent is attached too, thankfully my towbar held well and the electrics :), the blue boxes are the 12v cool boxes, excellent fridges, keeping food and drinks icey cold all weekend.

And this is on site, trailer tent set up and camper in pride of place next to it ! What this picture doesnt convey is the 3 hrs it took us to get the tent up, we bought it a year ago off of ebay, and this was the first time we unpacked it and put it up ! It didnt help not having the space at home to test it first, anyway we now know and luckily the ebay auction was honest and genuine, so no nasty surprises with missing parts !


This is on the saturday night, it was pouring down but we had a barbecue planned with friends, so we rolled the awning out and put the camping table underneath with the barbecues on in metal stands, I was a little worried that the heat rising would damage it, but it didnt even get warm ! Next worry was with the rain was wind ! I worried that the awning wouldnt handle the wind, but neednt have, once out and adjusted, and legs pegged down, this is a VERY solid awning which would have taken some pummeling to damage, so in a practical sense, I actually made a very good choice when I bought it, and its a great size for the van, just wide enough and extends more than enough for shelter or shade.

You might have noticed the camper has changed a bit between the last 2 photos :) My good friend Jamie cut me a load of vinyl pawprints, based on my dog Barney's pawprints, I took a photo of the bottom of his paw, put it on the pc, then took the shape of the pads, and these are what I got, so they are extra special :). I took them down with me and spent an hour or so putting them on in wind and the odd spot of rain, but love them, thank you so much Jamie, will call you soon re Chloe :).

Well thats it for now, I will soon be getting on with the cupboard for the electrics, but first I want to sort the kitchen cupboard doors out as they are still scraping the floor and starting to leave scratches, which means that one day im going to be so fed up with them that I will be ripping them up and replacing them ! For now though I will get the doors sorted. I also want to set the bed up with the bedding on to see how it looks :) So may get a pic of that soon too.
Took a quick pic of it tonight on the phone, was getting dark and as I went to sit in the back, noticed how cosy the lights made it look in there :)

Monday 6 July 2009

Some polishing off .......

Well spent the past couple days working on the camper, yesterday (sunday) I got a message from Tracy to say that her and Rob had the curtains back and were going to drop them down, so we quickly went out to the caravan shop on Bristol Rd in Gloucester. Not having much to spend, we settled on some caravan shower curtain rail and fixings, this is thin plastic rail that is flexible and will bend to curves, at only £8.60 per strip, it was less than half the price of the metal gliss curtain rail, and does the job, it still cost about £40 all in once we'd bought all the brackets and hooks.

Anyway once Tracy, Rob, Dusty and Harvey had come down and wrecked the camper whilst delivering the curtains (see dirty floor in pics !), :P, I set about cutting the rail to length and fixing them above the windows. I am very impressed with the curtains, Jean, Robs mum did a fantastic job on them and they sooooo match the interior :). See for yourself below.

Late into last night, ummmmm 1am to be exact, I glued the carpet to the remaining rear roof panel and the side loading door panel, and refitted them, I was holding off on the roof panel until I decided what was happening to the tv, but even if I knew, the panel would still have had to be covered, so did it now, makes a big difference having the whole roof yellow, much neater.

Today, I decided I would finish off the seats, still had a few jobs to do on them, and as Im not going to get the cupboard built before we go away or the electrics installed, I thought it best to finish off all the jobs that need finishing.

Seat wise, the seat opposite the kitchen unit, I still needed to cut some more off so it fitted past the kitchen unit when folded out into the bed position, I also had to fix the metal trim I had made for it on, I also wanted to change all the hinges I had put on for thinner flush fitting ones, and then I needed to carpet the top of the seat board to hide the wood and hinges that were showing. Once I'd done all that, Jen said that we needed some kind of 12v power at the back of the camper for the 12v cool boxes we have ready for thursday when we take it away, so whilst the seat was out and on a bench, I fitted a 12v socket to the front of the seat, and wired it ready to connect to the leisure battery. You can see a pic of it and the blue carpet beneath the seat pads and the metal trim in the pic below.

Once that seat was finished, I had to take the other one out. Needed to make the metal trim up for this one from scratch as I hadnt done it yet, then fitted a lid "stay" so that when we lifted the top up to access the storage space, you dont have to keep hold of it it just clicks and stays in the up position, you then push it back slightly and it releases to fold it back down. Then I needed to carpet the top like the previous seat. So all in all there was alot of work really just on those couple of things.

Its actually starting to look nice now and homely, something you could maybe ohhh I dont know, sleep in ? :P


Next job is to sort the kitchen unit doors, that are still scuffing the floor when they open. I also have to decide what wiring I am going to be doing before we go away, I dont need much, but as said before a socket for the cool boxes is a must to keep the barbecue stuff cold on the trip down etc. Would also like to get the seat/bed cubes done quickly just so I can try them out and see if they work, but these arent essential to the trip so will see what time I have left. Oh and would like to sort out a shelf in the kitchen unit that will house the gas bottle safely. Apart from that, I dont think there is alot else I can start on before thursday, will update the blog again hopefully before we go.
One last thing, the outside of the camper is going to look a bit different soon, I asked a friend that works as a sign writer, if he could make me up some vinyl pawprints to put on the camper for now and for a bit of fun when we go away, he agreed to in exchange for some pet photography, which I will gladly do ! :) Today he came up trumps and brought them round, they are going to look awesome ! :) Thank you so much Jamie !. Hoping to put them on on wednesday, so look out for a pic wednesday night :)

Saturday 4 July 2009

Safe and sound .....

Nothing else has been done conversion wise, but my brake parts did turn up the next day, so after cleaning the antirust stuff off the disks, fitted those, then found that the brake pads were different, so ended up putting my old ones on and ringing Vern and asking him to order the correct ones. Once I'd built it all back up I took it up the road and the brake pedal was awful, like there was air in the system, so parked it back up to wait for the correct brake pads.
Next day rang Vern and he said the VW guy that rang him insisted they were the right pads but that they had been modified, and sure enough I stripped it all back down this evening and they slotted in fine, built it all back up and took it up the road and a completely normal responsive brake pedal, result ! :) Another job out the way thankfully.

Not going to get alot done before Thursday, had wanted the cupboard built and the electrics done, but that wont be happening now, just not enough time. So will concentrate on carpeting the remaining 2 panels, and general tidying up and finishing off of the seats, which also need to be covered on the seat boards. Also want to make the bed cubes, and if I can get all that done maybe make a start on the cupboard framework. Then that will be about it until we come back.
Sorry forgot to take pics again, and im not taking the wheels off again anytime soon :P.
Oh talking of wheels I may have found some alloy wheels thanks to Chris, he owns a 2 litre turbo Golf, and is looking to change his wheels, and I really like the look of these. Have been speaking to another friend tonight, and he says the low profile tyres that are on it are a no no for a van, would make the ride way too hard, so would need to get normal tyres put on them, so I now have to come up with an offer thats good for both me and Chris, so speak to you soon Chris ! :)

This is Chris's Golf with the wheels on, they are 17", and I think they would look great ! What do you think ? Opinions please before I go ahead and buy them ! :)

Wednesday 1 July 2009

Good News, Bad News.....

Well the show went great, the camper was brilliant, the awning did a great job, and with the side door open and the tailgate up, on a very hot day sitting inside was nice in the slight breeze that blew through. The limo tinted windows did a great job of keeping most of the sun out, but the curtains as well on the window opposite the side door would have made it that much cooler, so looking forward to getting those. Hoping they will be ready soon ! :)

The photography went well, wish I'd said I would do it officially now, had a few people come and ask how much I charged when they saw me working, next time, if you are reading this Jan ! :)

This is the camper set up, the white background you can see was pulled out each time I needed to use it and rolled back when not in use to stop it getting marked.


And these are a couple of the pics I managed to get with the above setup on the day :) Really enjoyed doing them !
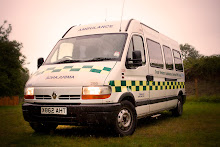
Now the bad news, I drove it back home after the show and it stood for 2 days until I took it to work at the chinese, it felt sluggish on the way there, and after the first delivery I realised the rear brakes were seized, when I got back to the shop I went round and touched the wheels, and the drivers side rear was red hot, so I knew which brake was seized. Took it all apart today expecting to have to get a new caliper, but the caliper was fine, it was the handbrake lever that works the caliper when the handbrake is pulled on that was seized. The disk was very scored and had a rusty strip where it obviously wasnt being acted on by the brake pad. So I ordered a new set of rear disks and pads, and stripped all the brakes down, freed off the handbrake caliper lever, and its currently sat on the drive awaiting the new parts, hopefully they will come tomorrow. The parts were actually fairly reasonable. The disks were £21 each plus VAT, and the pads £20 plus VAT, all in all £71.30, so once I have bought some more copper slip grease, I guess £75. Could have been worse, and at least now I KNOW the rear brakes have been serviced, will check the front brakes if I get a chance tomorrow too. This camper is getting towards being totally rebuilt if it goes on much longer like this ! I am getting a bit fed up when each problem comes up as it takes money away from the conversion, but I guess its gonna be as reliable as I can get it once im done. I did think to myself when this happened, thats it, im giving up and going to see how much I can get for it and buy a cheap car instead, but I have gone so far with it, and when it is finished, it will be worth alot with all the new parts and the conversion, and at least with it all being done, I wont have to expect trouble from the new parts for a while.
One thing that is niggling me, is that the clutch thrust bearing is noisy, and its brand new !, bought a complete clutch kit when we replaced the engine, and Im not sure what to do about it, getting the gearbox off to replace it is going to take alot of work, its all very well claiming a new one under warranty, but I would need to claim the cost of the work to replace it too, and im not sure I can be bothered with a fight for it, will see how it goes and if it becomes a big problem in the near future. Might ask Vern, who supplied the clutch kit what his suppliers are like in this situation when I go pick up the brake parts tomorrow.
Thats it for today, will photograph the new parts in place when fitted tomorrow, and post up later, the good thing about this blog is that its a good reminder of all ive been through with this conversion, but also if i do decide to sell it further down the line, it creates a history for the camper for all the time ive had it, with pictures and prices proving its had all this work done, so any potential buyers can have a read through and see what a good buy it will be !!!! :)
Im NOT thinking of selling it by the way, but the reason I am doing everything properly and not cutting corners, is that I want it to be safe and the work to last, and it will add to the value just IN CASE I sell it one day.

Saturday 27 June 2009

Nothing Else Done, But Its Off To Work Tomorrow...

Nothing else done as yet, although have fitted the trim on the edge of the worktop, and did actually cut a new work top that gives some overlap all round. Will try and get started on the cupboard on monday, really want to have my electrics sorted for week after next when we go camping, the camper wont be used, we are using our trailer tent, but using the camper to tow it and I think it will be used as a sitting area by the 40 odd friends that will be there too. Oh and today we bought one of the water containers, a 10 litre one with a tap, the tap isnt important, but the size is, and leaves plenty of room for the second waste container and gas bottle. (Plus need a sink and hob too !) :P


Some of you will know that I do Pet Photography, and tomorrow we are attending a rescue dog show which we are also one of the sponsors of, anyway, I was invited to be the pet photographer of the day, but I dont like doing crowds, id rather be in a one to one situation, its a confidence thing, anyway another pet photographer was invited so I miss out on that one, but a couple friends have asked me to photograph their dogs at the show, so was playing around with my kit to see if it would work. It did :).

This is my dog Barney ......

And this is how I took his photo, on our driveway, in the dark, using my camper canopy to reflect the flash light back down onto the white vinyl background, so the camper is going on its first official (well non official as I turned the offer down !) working job tomorrow :).
This is one of the reasons I wanted a camper, for going out on photo meets with other photographers and being able to have a chat and a drink afterwards, which is why I was so insistent on the L shaped seating, easier to talk to people than the normal rock and roll style seats where you sit next to each other in the forward position.
Thats it for today, check back soon and see how I do the cupboard :)

Monday 22 June 2009

Not an awful lot done this weekend, what with the dog rescue and Fathers Day visiting etc, but today managed to cut the Contiboard down for the kitchen sides, which allowed me to fit the doors, which threw up a couple problems that will need sorting.

I made the unit a couple mm out either side, so the Contiboard actually stands proud of the worktop, which wont look good, so I have two options, one, take the kitchen apart again and cut it down a cm or so, alot of work, and I really dont want to be unscrewing the Contiboard too often as it is made of chipboard and will weaken the screw holes. Second option is to cut some more worktop and throw this one away, which is an awful waste, but the whole worktop did only cost me £10, and I dont have a use for the leftover as yet. So that is probably the way I will go.

Another problem I have is that the unit door nearest the back, scrapes the floor as its opening, this will eventually scratch the laminate flooring and wear the top of it away, so I need to do something about that asap, cutting the door down slightly isnt really an option, so may need to raise the kitchen unit slightly with some kind of spacer. The other side swings open freely, so its a bit annoying, in hindsight I should have built the unit slightly higher to allow for adjustment of the doors, so now have to to do a fix, but the good news is that if I ever do this again I will now know :).

Removed the side loading door panel too, finally, will cover it in the carpet tomorrow, and insulate the door whilst the panel is off.

Finally, screwed the seats down to the floor, just temporarily, so we could use it this afternoon without the seat flying across the van when we go round a corner ! We popped down to Clevedon by Bristol, to do a Home Check for a rescue dog, it was the first proper test of the new engine. On the way out of Gloucester, the van was sluggish, and although foot to the floor, it didnt really accelerate, I had a suspicion the turbo wasnt working properly, but had only driven it doing the chinese and down to my mums, but didnt get any speed up, anyway Jen drove and she thought the turbo too, so will have a look at that some time, could be a split vacuum hose or something, I know the turbo works as it was the one from my old engine. As we got down past Gordano, Jen said it was pulling better, so maybe it was blocked injectors, it had been stood for 3 months doing nothing, maybe a blast down the motorway was what it needed. I will check the pipes for the turbo anyway just to be sure, also have to replace the small rubber bleed off pipes from the injectors, Jon noticed they werent looking too good when we replaced the engine, so bought a length of it from Vern the other day (Vern's Autoparts, Tredworth).

Anyway this is how I left it tonight, I have been drawing plans for the cupboard that will be on the right of the picture, and also the cubes that are to fit inside the seats, and then support the bed when folded out, so still have more building to do.

Good news is the jobs are getting less and less now, with alot of jobs done, still a fair way to go, but its all starting to come together and look like something ! :) Be nice to actually use it and not worry about what I havent done on it yet, although as Martin says in his conversion guide, you never really finish, you can always think of a new improvement !

Saturday 20 June 2009

A little more done.....

Didnt get started until teatime today, so not too much done.

Managed to scrape enough together to get my doors for the kitchen today :)
Couldn't fit them today as the hinges I have are too short, so will have to have a look through the screwfix catalogue and see if I can find something longer.
So busied myself with the bed seat, removed the short metal trim that I glued on the other day and made up a trim to go around the whole front of the frame in one piece, so that it looks better and doesnt leave any sharp edges. Didnt get to glue it on but its all cut ready :). Also fitted a stay bracket, these things are great, only £1.56 each from Screwfix, and are just about strong enough to keep the seat lid in the up position with only one fitted to one side, forgot to take a pic will try and add one tomorrow, but means that I can put the seat up and sort stuff out in the storage area underneath and have both hands free. I only bought one to see if it would work, now I know it does I will get another one for the other seat.
Before I took the seat out to work on it, I marked the folding seat board for the cut out that will fit around the kitchen unit, it works, but think I will need to take a touch more taking off, as I will be covering the seat tops in carpet, so this will add thickness to it.
Finally I balanced the folding seat board in the bed position and laid the seat cushions out, to make sure they didnt have to be squashed up too much, and as I hoped, it was a snug fit with only a couple inches maybe of squashing, as you can see in the pics, it barely makes a difference to the bed. :)

Maple Style Modern Doors from B&Q, 500mm x 715mm, £7 each

The Seat Board cut, and folded into the seat position, then folded out into the bed position below, works a treat :)

And finally the bed made up, being 'balanced' with some pieces of wood precariously placed underneath, but worked well enough for the pics :) Below is the view from over the drivers seat.

Well thats it for today, tomorrow Im hoping to bolt the seating through the floor, so that it doesnt slide round the camper when im driving ! :) And maybe get some hinges to fix the doors on, the sides of the kitchen unit will have to wait a bit longer, but will be done as soon as I can spare the cash ! :) Once the sides are on I will fit the kitchen unit properly.

Oh one problem I have encountered is that the 15" lcd tv I was going to have fixed to the roof above the kitchen is just going to be too big now, with the kitchen being higher etc, we do have a smaller 9" tv with freeview built in, but once both the kitchen and cupboard are built I will look at what other options I have, but playing the Wii from the back of the camper probably wont be a possibility now ! :P I have a couple of 7" monitors too, and the 9" has an AV out, so may be able to fit them all and link them to the 9" tv, but I need to get the basics in there first, all that will have to be planned when I start on the electrics, which hopefully wont be far off now, Im just waiting for the cupboard to be built so I can fit the Zig unit into the side of it.